Skip to Main Content
PolyU Library

ORCID

What is ORCID and how it helps in managing your research activities throughout your career?

After you have registered for an ORCID iD, the next step is to add publications to your profile so that you can reap the benefits that your ORCID brings.

An easy way to do this is to integrate your ORCID with your Scopus Author ID. With just a few steps, all your publications indexed in Scopus will be added to your ORCID profile. The integration between ORCID and Scopus can be done with either way below:

  • Option 1 - Use "Connect to ORCID" from Scopus
  • Option 2 - Use "Search & Link"​ from ORCID

Notes:

Scopus Author ID is automatically assigned to you when you have published a work covered in Scopus. You may have more than one IDs in Scopus if you have published under variant names and affiliations. It is always a good practice to merge your multiple Scopus IDs and keep all your works listed under one unique ID. This ensures that your total citation counts and h-index in Scopus are accurate. 

By following the steps below, your multiple Author IDs in Scopus can be merged along with the integration process. You may also request a merge separately by using the Scopus Author Feedback form. Refer to this page for details.

You can only add publications from Scopus to ORCID, not the other way around.

Steps to Add Works from Scopus to ORCID

Refer to the instructions in ORCID-Scopus@PolyU: Quick Guide.

Step 1. Login to your ORCID

  • If you have registered an ORCID account, log in with your email or ORCID iD at https://orcid.org/signinClick on Forgotten your password to retrieve your password if needed.
  • If you haven't got an ORCID account, register a new one via this page.

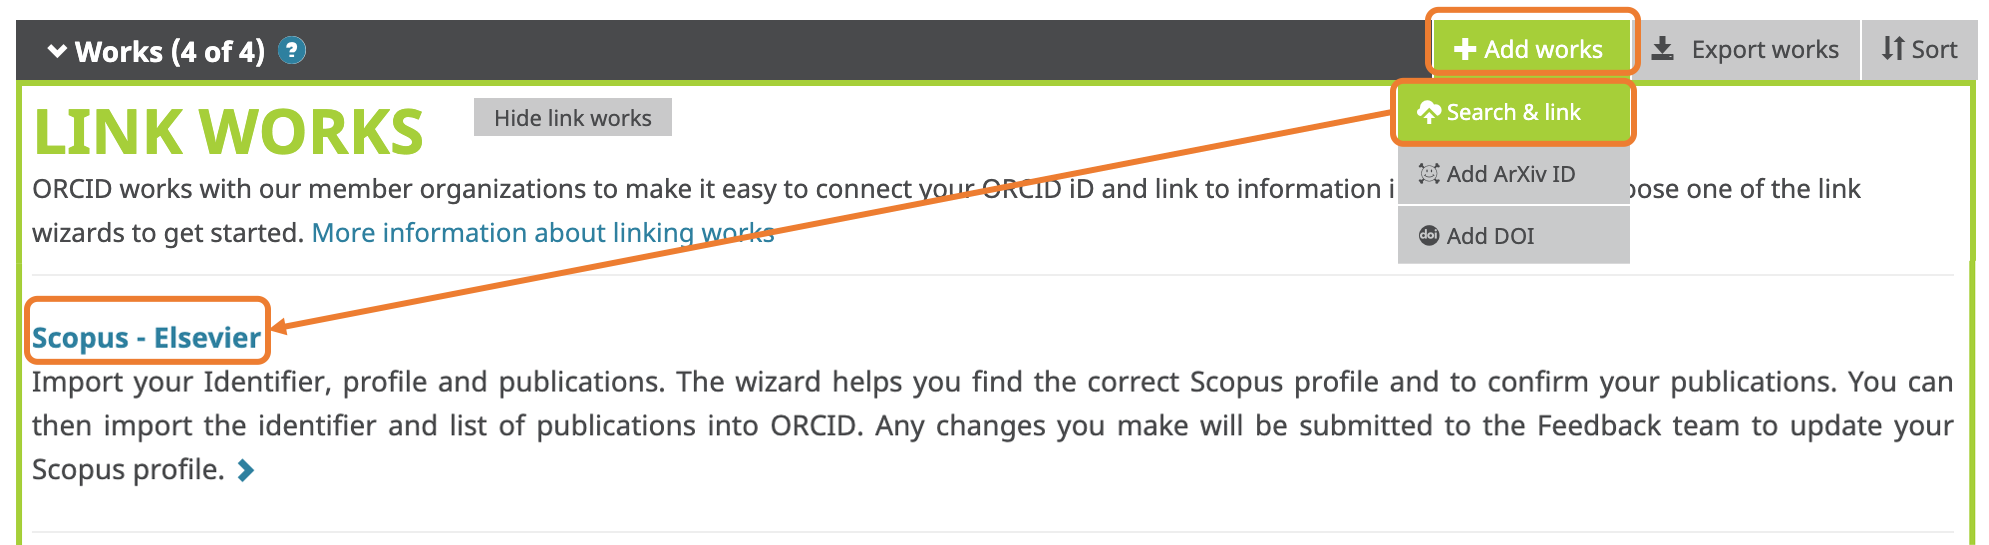
Step 2. Click on "Scopus to ORCID" under Add Works


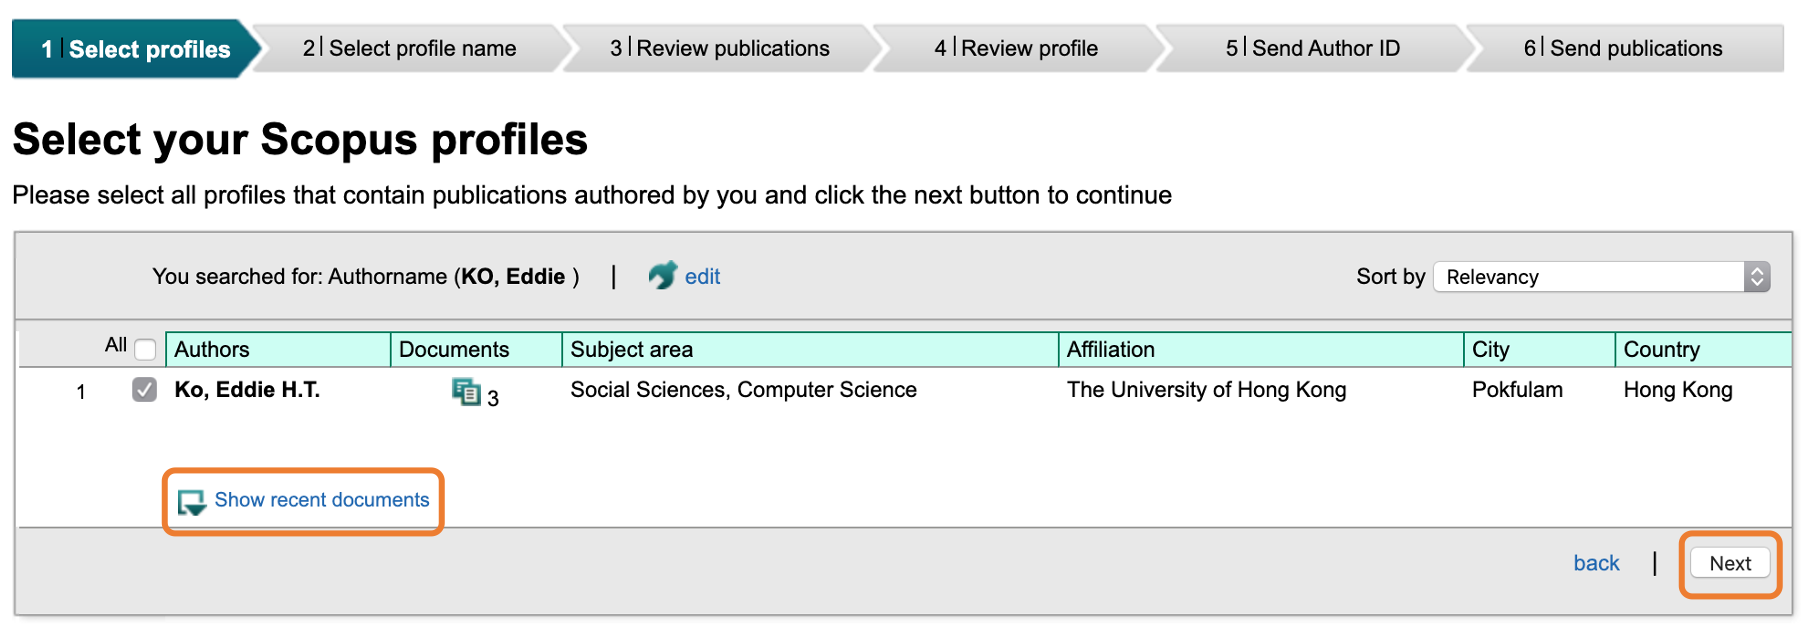
Step 3. Add publications from Scopus to ORCID

Go through a few steps here to complete the integration process. After this, your publications will be sent from Scopus to your ORCID profile. If you select multiple profiles or add in missing publications during the process, your Scopus ID and the associated publications will be updated as well - but the change will take 2-4 weeks to be reflected in Scopus.

  1. Select profile
  2. Select the preferred profile name
    • Select a preferred name from the pull-down menu and click on Next. It is good to select the name you use in your publications.

      Click to see the screenshots

  3. Review your authored publications
    • Review the list of publications and click X to remove those that do not belong to you before clicking on Next. Click on Search for missing documents to search for publications that are not on the list. Search by title will give more accurate results.

      Click to see the screenshots

  4. Review the Scopus profile
    • Double-check if all your publications are included in your profile before clicking on Next. If not, click back and search again.
    • If you selected publications and names which are different from your Scopus author profile, you will be asked if you would also like to update your Scopus profile. Click on Yes, update my Scopus author profile if you wish to update your Scopus profile at the same time.

      Click to see the screenshots

  5. Send the Scopus ID to ORCID
    • Enter your email address twice and click on Send Author ID; after this, your Scopus ID will be displayed in your ORCID profile.

      Click to see the screenshots

  6. Send publication list to ORCID
    • Click on Send my publication list to add your publications to ORCID. Your publications in Scopus will then be added to your ORCID profile. You can click on return to ORCID to see the publications added to your ORCID. 

      Click to see the screenshots